

 Handles, Legs & Lighting
Furniture LED Lighting: Strip, Power Supply, Sensor
Furniture LED lighting is a set of parts matched in voltage and power: the LED strip, a power supply sized to it, and a sensor or remote to switch it. Connect nothing until you have read the marking on the strip and on the power supply. This article explains why the strip's voltage decides everything else, how the power supply rating is worked out, where the sensor and the remote sit in the circuit, the order of connection, and the mistakes made most often.
Where LED is used in furniture
The most common place is under kitchen wall units: the strip lights the worktop, so brightness and evenness matter here, and the light is switched by hand — with a touch sensor or a switch. The strip is placed near the front edge of the unit so that the light falls on the worktop and not on the wall.
Inside a wardrobe or cupboard the light is needed only while the door is open, so it is connected through a door sensor. In display cabinets and on open shelves the light is decorative: low brightness is enough and a remote is convenient. Drawers and night lighting along a plinth use short lengths. Plan furniture LED lighting together with the furniture design: the place for the power supply, the holes for the cables and the socket have to be provided in advance. For the rest of the kitchen fittings see the kitchen cabinet hardware checklist, and for wardrobes wardrobe interior fittings.
LED strip: voltage, power and cutting points
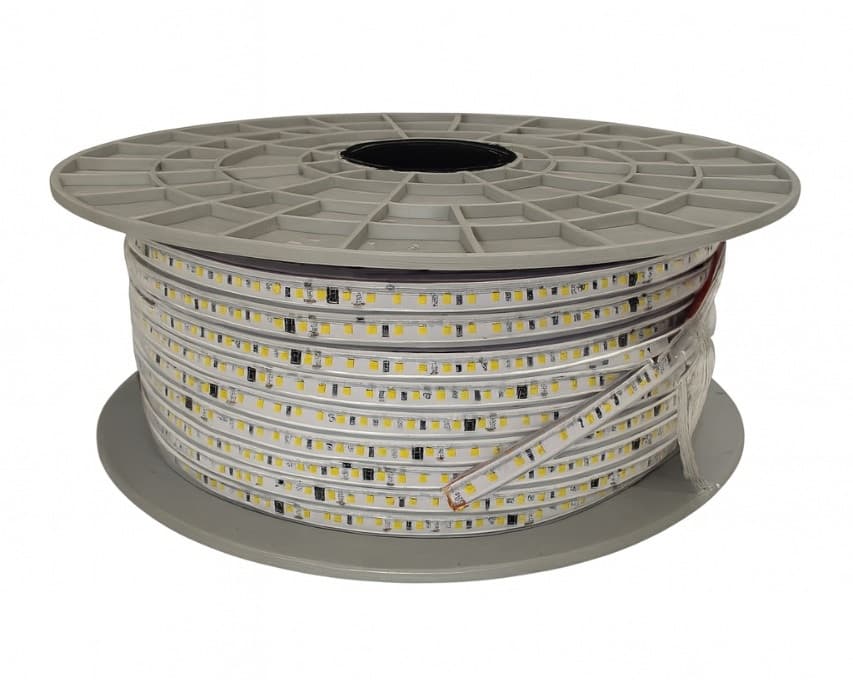
When choosing an LED strip, the first thing to look at is voltage, because everything else is bought to match it. Strips fall into two groups: low-voltage (12 V or 24 V) and mains-voltage (220 V). The voltage is printed on the strip itself and on the label of the reel. The 100 m reel in our catalogue is listed as 220 V: it is a mains-voltage strip in a thick clear sleeve, and it connects through its own power cord, not to an adapter. Connect nothing until you have read it: a 12 V strip plugged straight into a socket burns out, and a 220 V strip will not run from a 12 V adapter.
The second figure is power: how many watts a metre of strip draws (W/m). It is given on the label and is needed to choose the power supply, the sensor and the remote. The third is the cutting point. A strip may be cut only at the lines marked on it; a piece cut between the marks will not light. The cutting interval depends on the type of strip, and on 220 V strip it is usually much longer than on low-voltage strip, so work out the furniture dimensions with that in mind. On self-adhesive strip the backing film is peeled off just before sticking.
Sizing the power supply (adapter)
The power supply (adapter) converts mains voltage to the voltage a low-voltage strip requires. There are two conditions. First: the output voltage of the supply must equal the strip's voltage — 12 V for a 12 V strip, 24 V for a 24 V strip. Second: the supply's rating must be 20–30% above the total power of the strip. The sum is: multiply the strip's W/m by its length and add the reserve.
Example: 5 metres of strip labelled 14.4 W/m draws 14.4 × 5 = 72 W; with the reserve, a supply of about 90 W is chosen. If several lengths run from one supply, their power is added together. A supply run at full load with no reserve gets hot and does not last as long. The output voltage (V) and power (W) are printed on the body of the supply; when buying, compare both against the strip's label. This calculation applies only to low-voltage strip: a 220 V strip is not connected to a supply of this kind.
Sensor types: door, touch, motion
A sensor takes the place of a switch and turns the light on and off by itself. Three types are used in furniture. A door sensor switches the light on when the door opens and off when it closes — for wardrobes, cupboards and drawers. A touch or hand-wave sensor works when a hand is brought near; over a kitchen worktop this is convenient, because there is no hunting for a switch with wet hands. A motion sensor switches on when someone approaches — for a walk-in wardrobe, a hall cupboard or plinth lighting.
In a low-voltage set the sensor sits between the power supply and the strip: its input is connected to the supply, its output to the strip. The sensor has a limit of its own: the voltage it works at and the load it switches (in watts or amps) are printed on its body. The power of the strip running through it must be below that limit. Before ordering, check the sensor's type, voltage and load limit: a door sensor and a touch sensor are not interchangeable.
Remote control
Control by remote has two parts: the hand-held remote and the receiver unit (controller) connected to the strip. The controller also sits between the power supply and the strip: it receives the remote's signal and switches the strip on and off, and on some models turns the brightness up and down. It is convenient in display cabinets, the TV area and open shelves — places where the light is set to suit the mood.
Check three things when choosing. The controller's voltage must be the same as that of the strip and the power supply. Its load limit must be above the total power of the strip. The controller must suit the type of strip: single-colour strip connects with two wires and colour (RGB) strip with four, and their controllers are different. The type of signal matters too: an infrared remote has to “see” the receiver, so the receiver cannot be hidden inside a closed cupboard, whereas a radio remote works through a board as well. Check on the product which type is sold.
Connection order and safety
In a low-voltage set the order is: power supply, then sensor or controller, then strip. All connections are made with the supply unplugged, and it is plugged into the mains last. Watch the polarity: “+” and “−” are marked on the strip and on the supply, and a strip connected the wrong way round does not light. Put the supply where air can move around it and where it can be reached; do not wrap it in insulation or put it under the sink where steam and water get to it. It will have to be replaced one day, so do not hide it behind a panel that cannot be removed.
Everything that runs on 220 V — the socket, the mains side of the power supply, mains-voltage strip — needs particular care. Inside furniture there is board, dust and sometimes damp, so such parts are installed only as the product instructions and electrical safety practice require, with their own connection kit and end caps; a strip is cut only when disconnected from the mains. Leave work on the mains side — a new socket, concealed cable, connection to the circuit — to an electrician.
Common mistakes
The first mistake is an under-sized power supply: the strip is dim or flickers and the supply runs hot. The second is too long a strip fed from one end: 12 V strip is normally fed from one end in runs of up to about 5 metres, and the far end of a longer run is dull. A long run is divided into lengths and each is connected to the supply separately, in parallel. The third is mixing parts of different voltages: a 24 V supply on a 12 V strip, a 12 V sensor on a 24 V strip and so on. Read the marking on every part before connecting.
The fourth mistake is the surface. Self-adhesive strip stuck onto dusty, greasy or unfaced chipboard soon sags. Wipe and degrease the surface, and on a rough base stick the strip into an aluminium profile: it gives a smooth surface and takes heat away from the strip. The fifth is bending the strip round a sharp corner — it breaks; at a corner it has to be cut at a mark and joined with wire. LED strip, power supplies, sensors and remotes are in the catalogue.
For an overview of every type, see the furniture hardware guide.
Want to place an order?
You can easily place your orders via WhatsApp.